6 steps to follow in order to invite Adviser to your Xero File
Published on November 21, 2024
Managing your business finances effectively often requires collaboration with financial professionals. Xero makes it easy to grant access to your trusted advisers. Here’s a comprehensive guide on how to add an adviser to your Xero file.
Step-by-Step Instructions:
1. Log in to your organisation on Xero
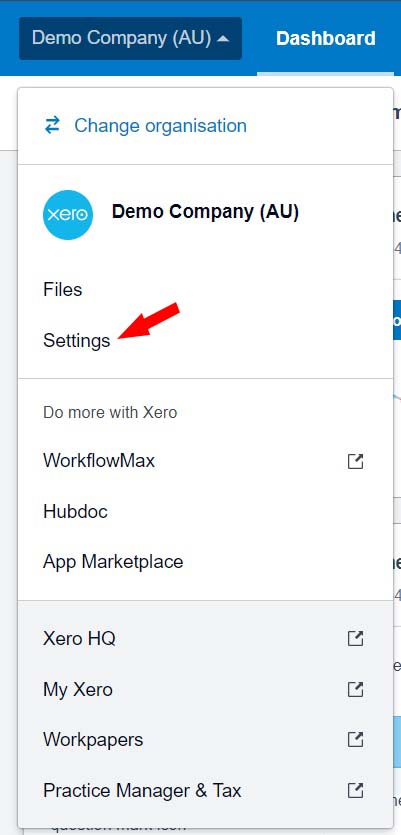
2. Click on your Organisation name then go to Settings
3. Click on Users
Note : Only users with Standard or Adviser user roles with Manage Users access will be able to invite new users.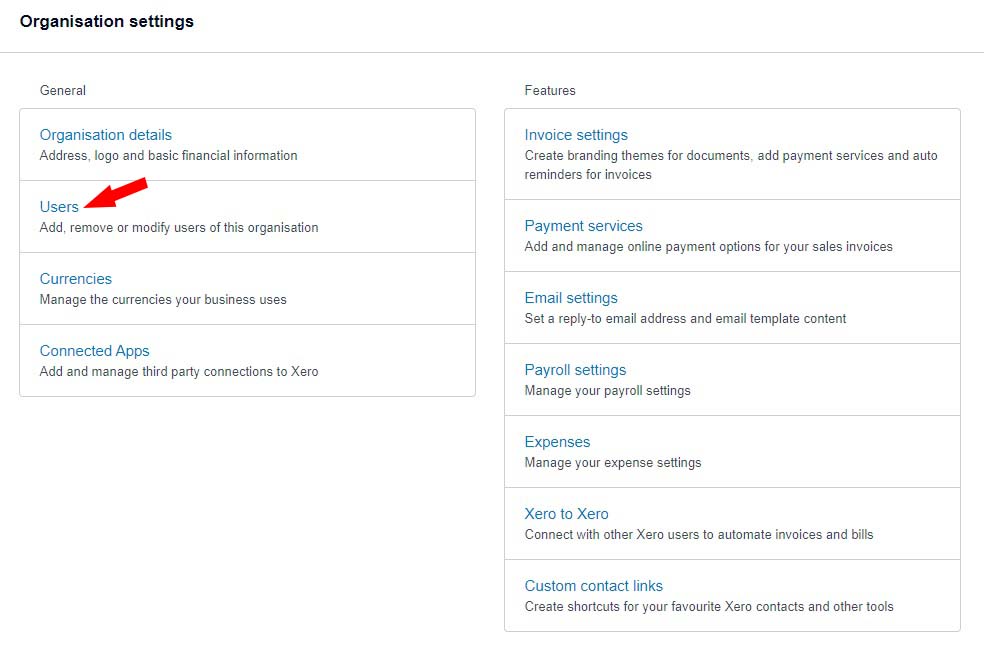
4. Click ‘Invite a User‘ to enter details for a new user.
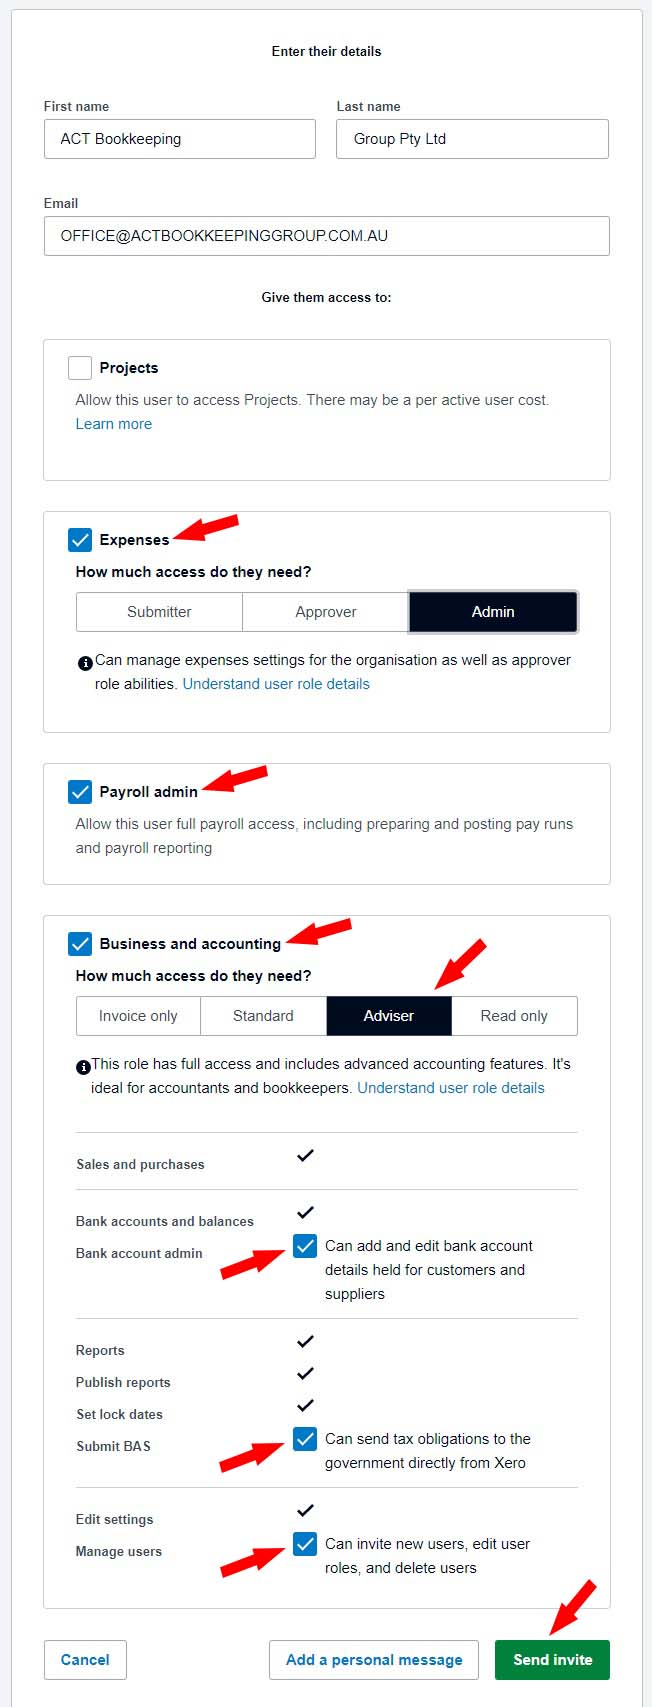
5. Enter ACT Bookkeeping Group Pty Ltd for the name, and office@actbookkeepinggroup.com.au as the email address.
- Select Expenses and choose the Admin role,
- Select Payroll,
- Select Business and Accounting and choose the Adviser role, then tick ‘Bank Account Admin, Submit BAS, Manage Users‘


6. Press Continue and Send an Invite